
01
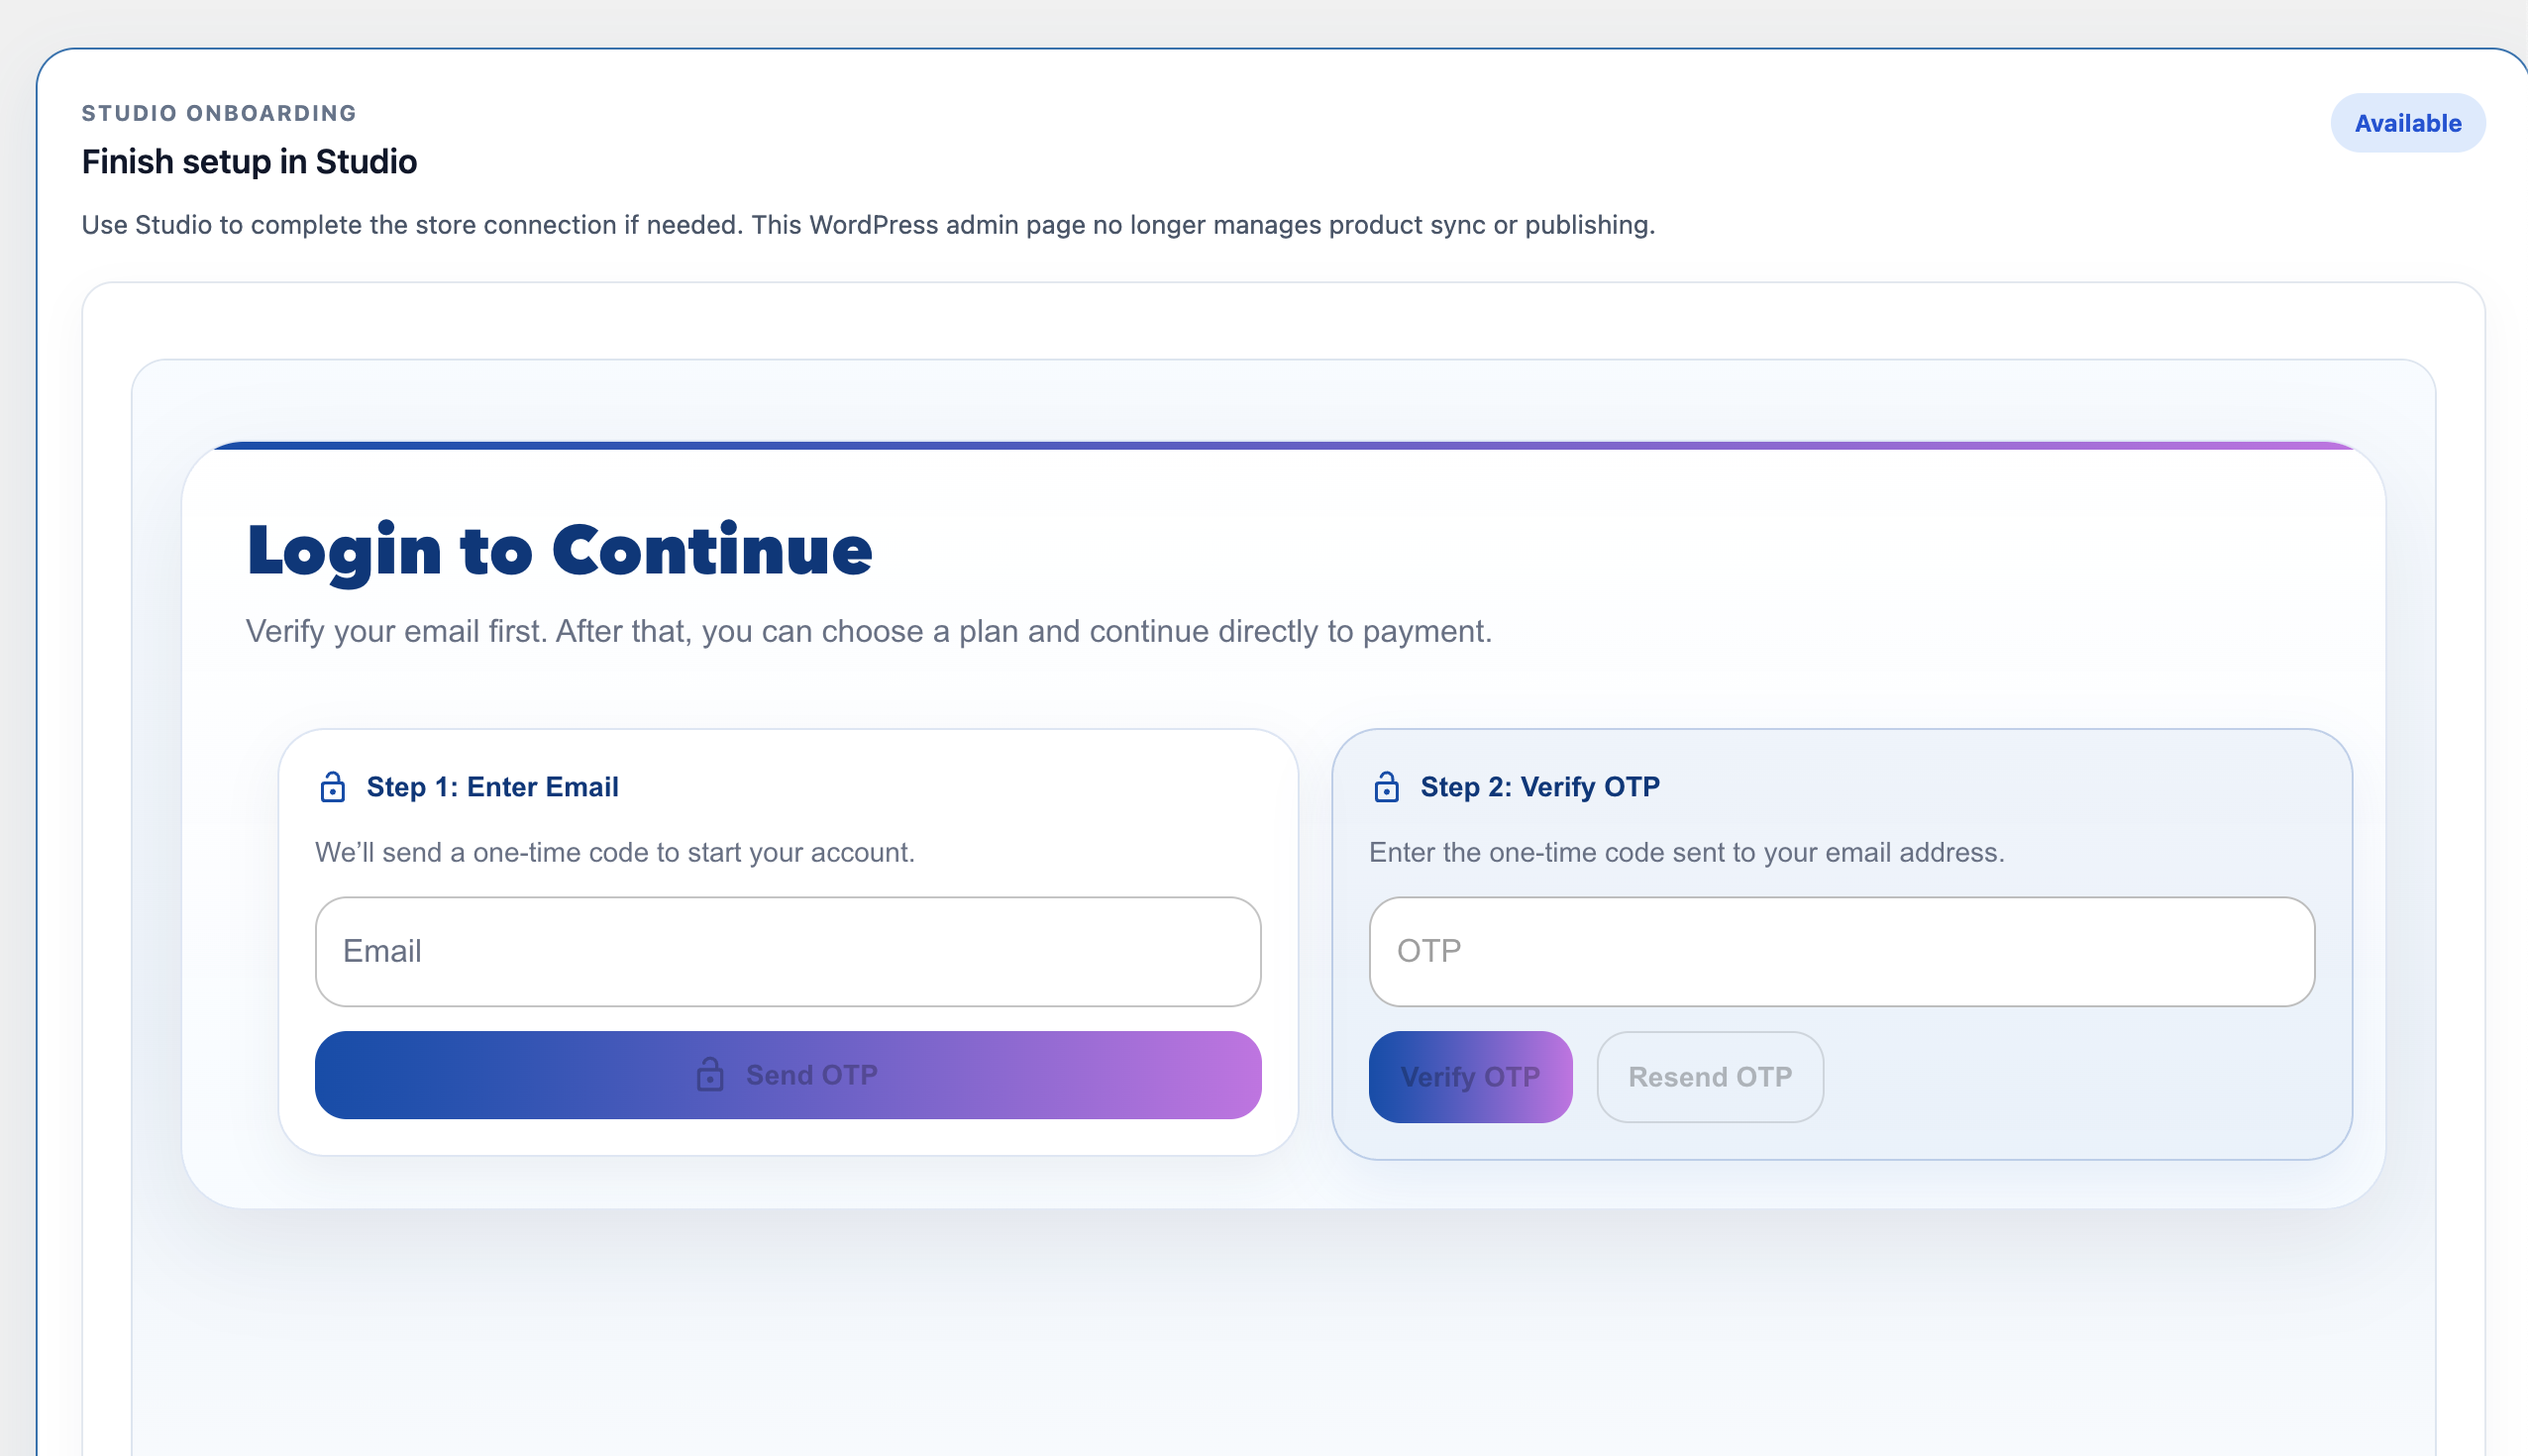
Register and verify your email
Open SpecFit from your WordPress admin, enter your email, and verify the OTP sent to your inbox. This starts the secure Studio connection.
Follow these steps to connect your WordPress website, submit frame images from the product edit page, and confirm that virtual try-on is live for shoppers.
Products should already exist in WooCommerce before requesting Try On.
Use clear frame images from your WordPress media library for each submitted variant.
The plugin setup must be linked to your SpecFit Studio account before requests can be sent.
Open SpecFit from your WordPress admin, enter your email, and verify the OTP sent to your inbox. This starts the secure Studio connection.
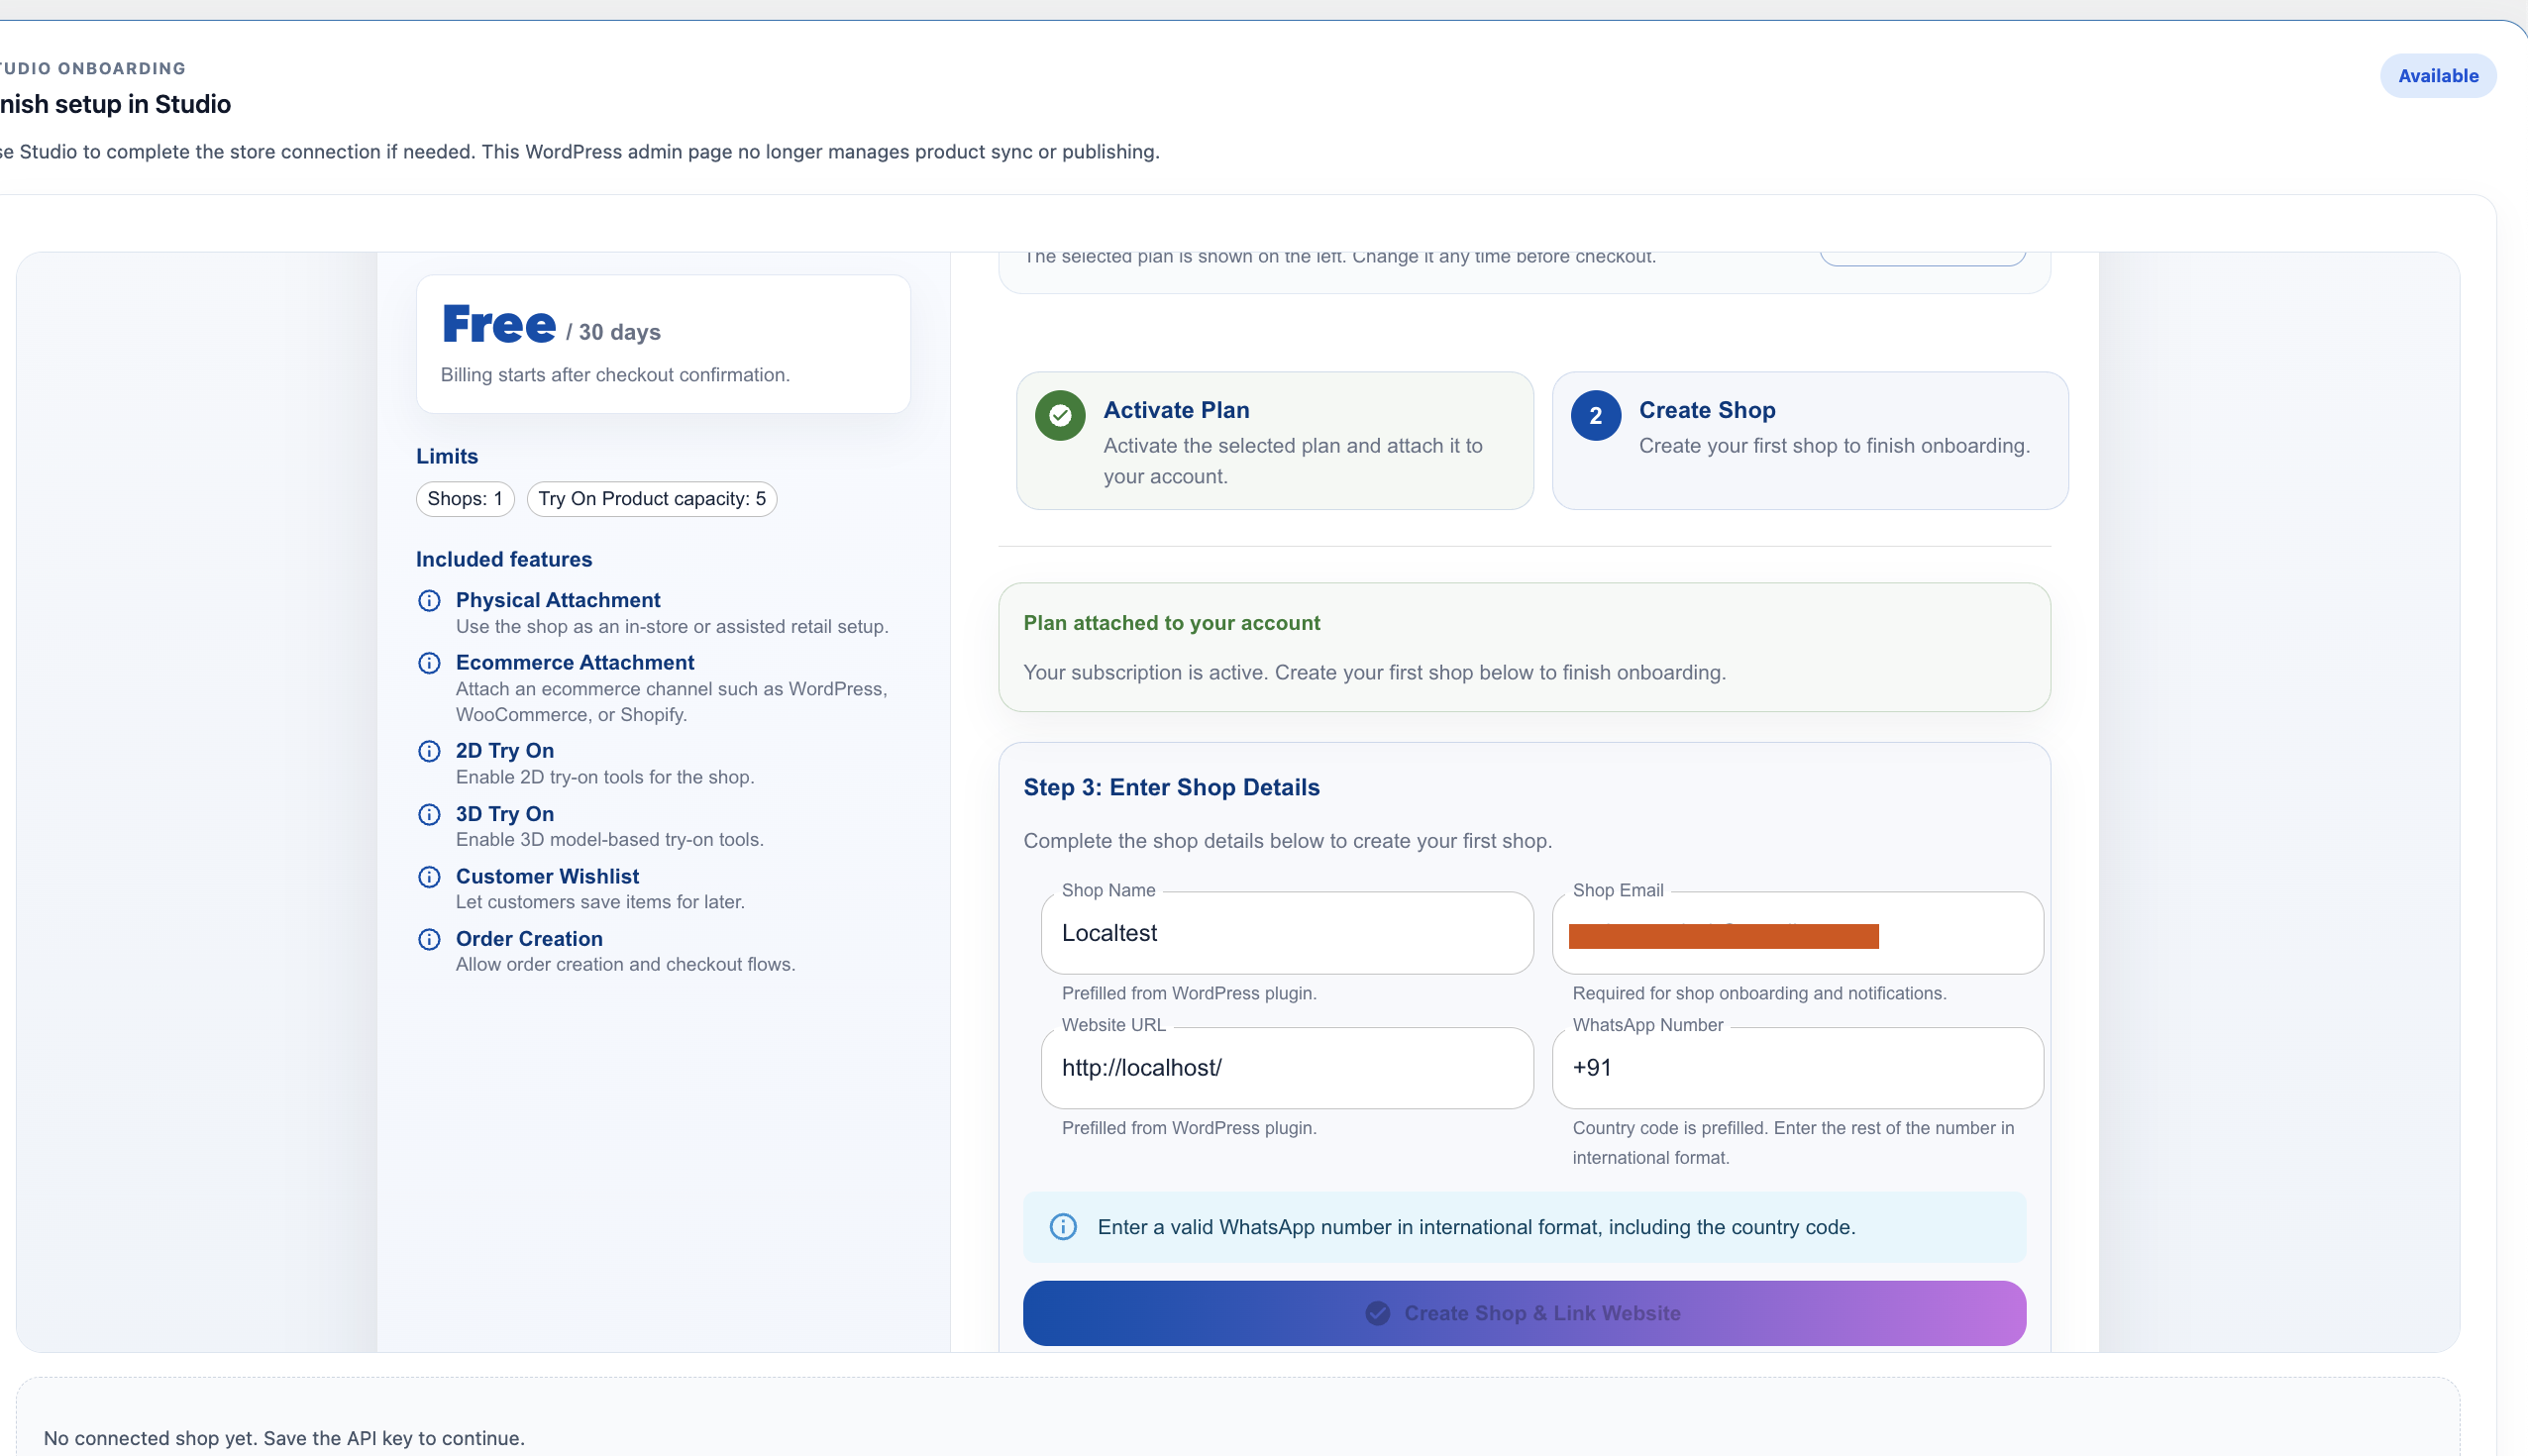
Choose the plan that fits your catalog, enter your shop details, and link the current WooCommerce website to your Studio account.
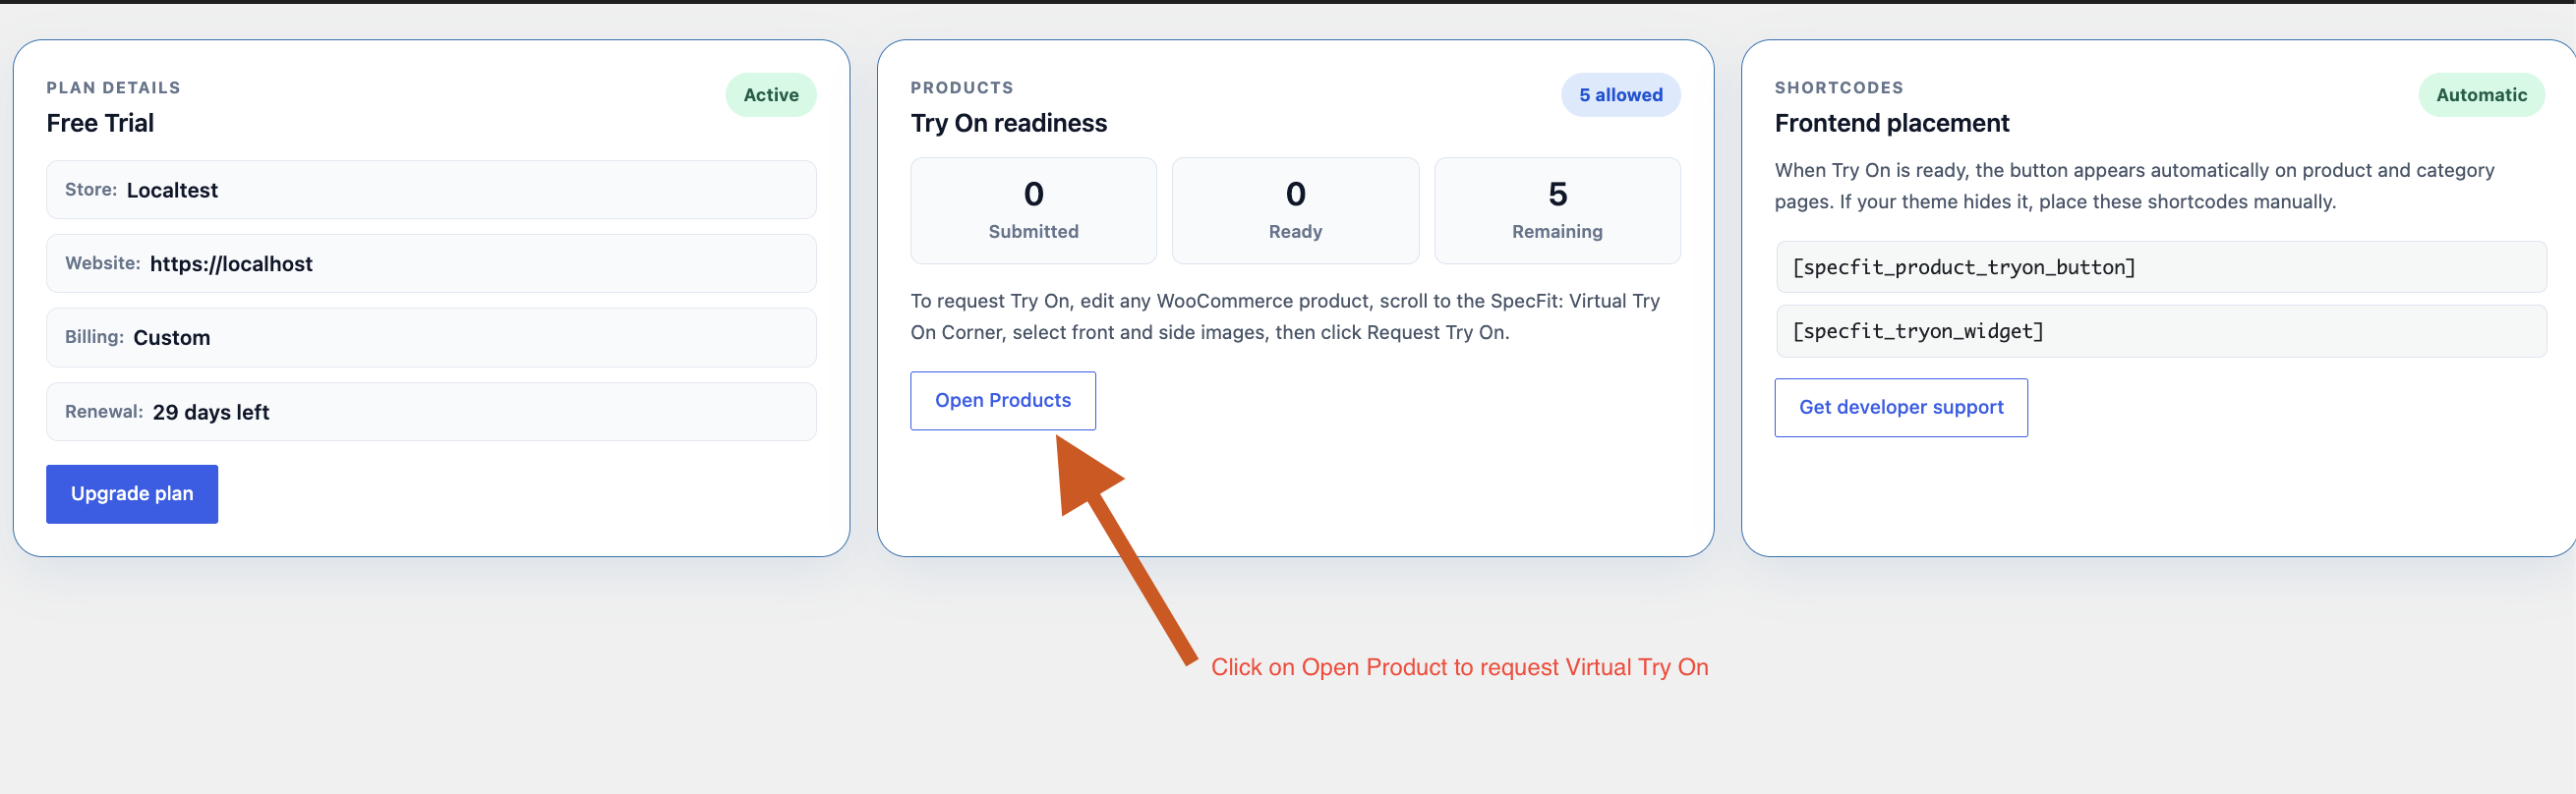
After linking, the setup page shows your live plan, product allowance, ready product count, frontend shortcodes, and support link.
Go to Products, edit the frame you want to enable, then scroll to SpecFit: Virtual Try On Corner. For variable products, submit each variant separately.
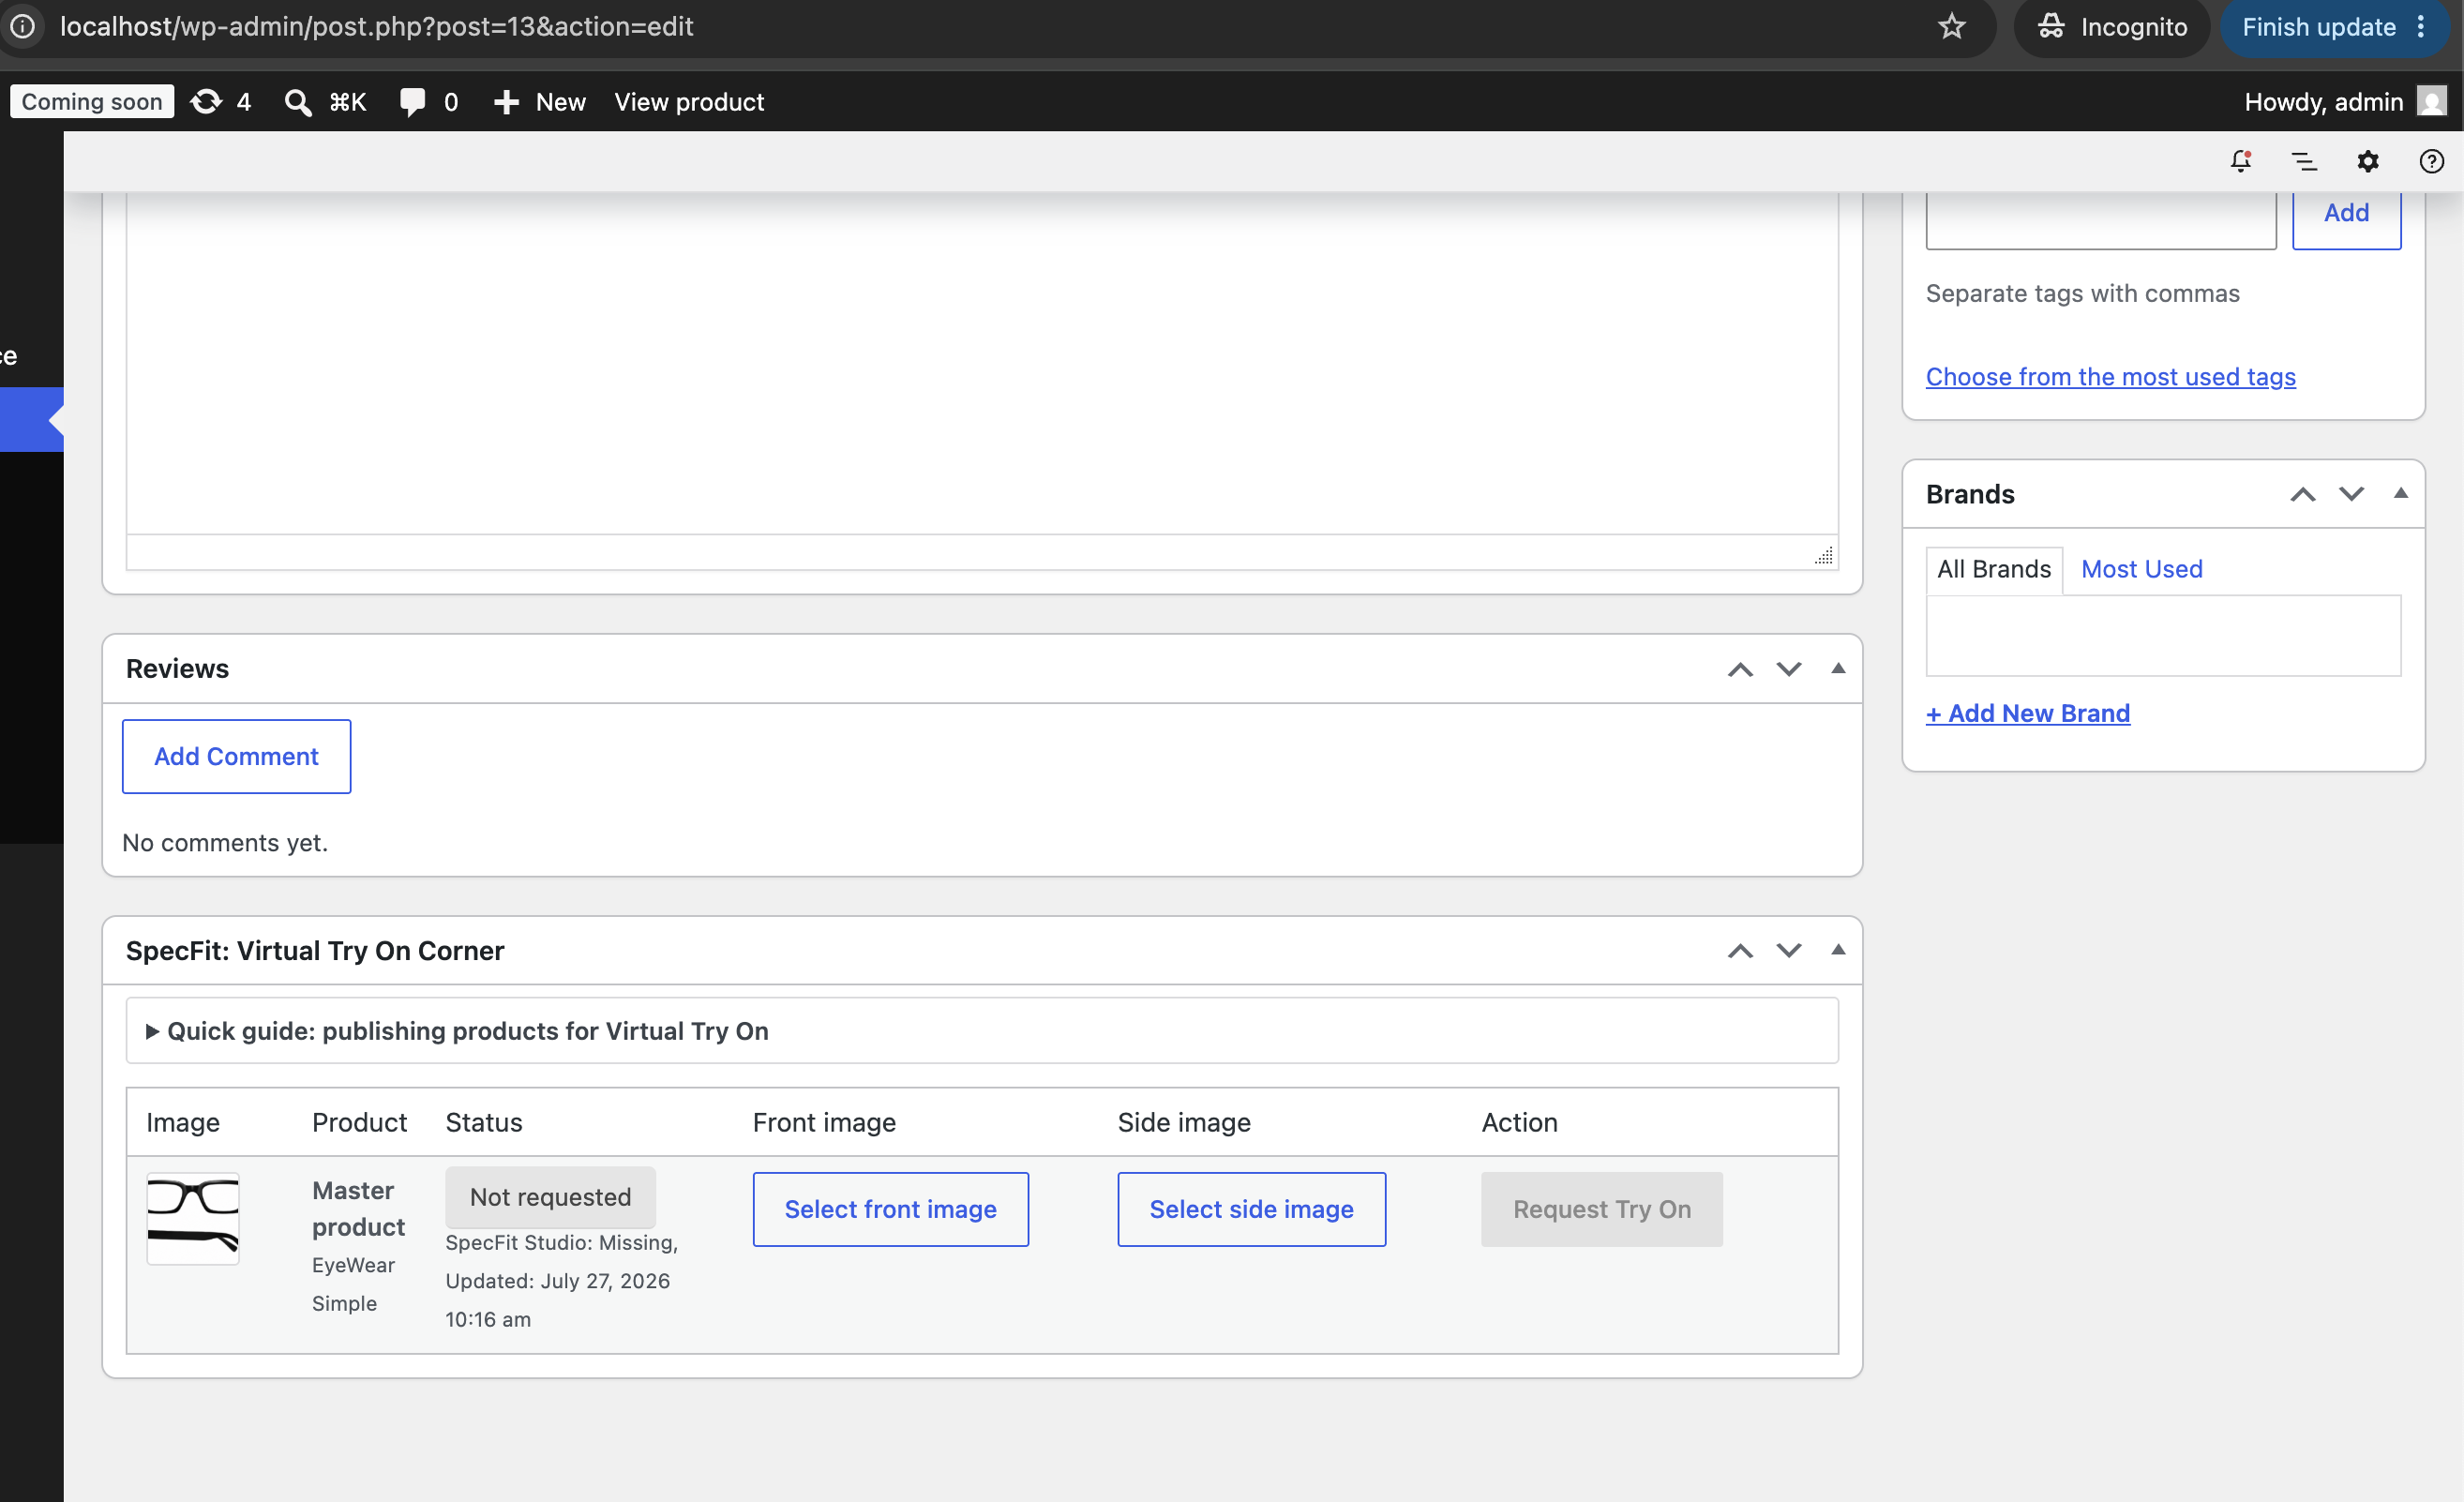
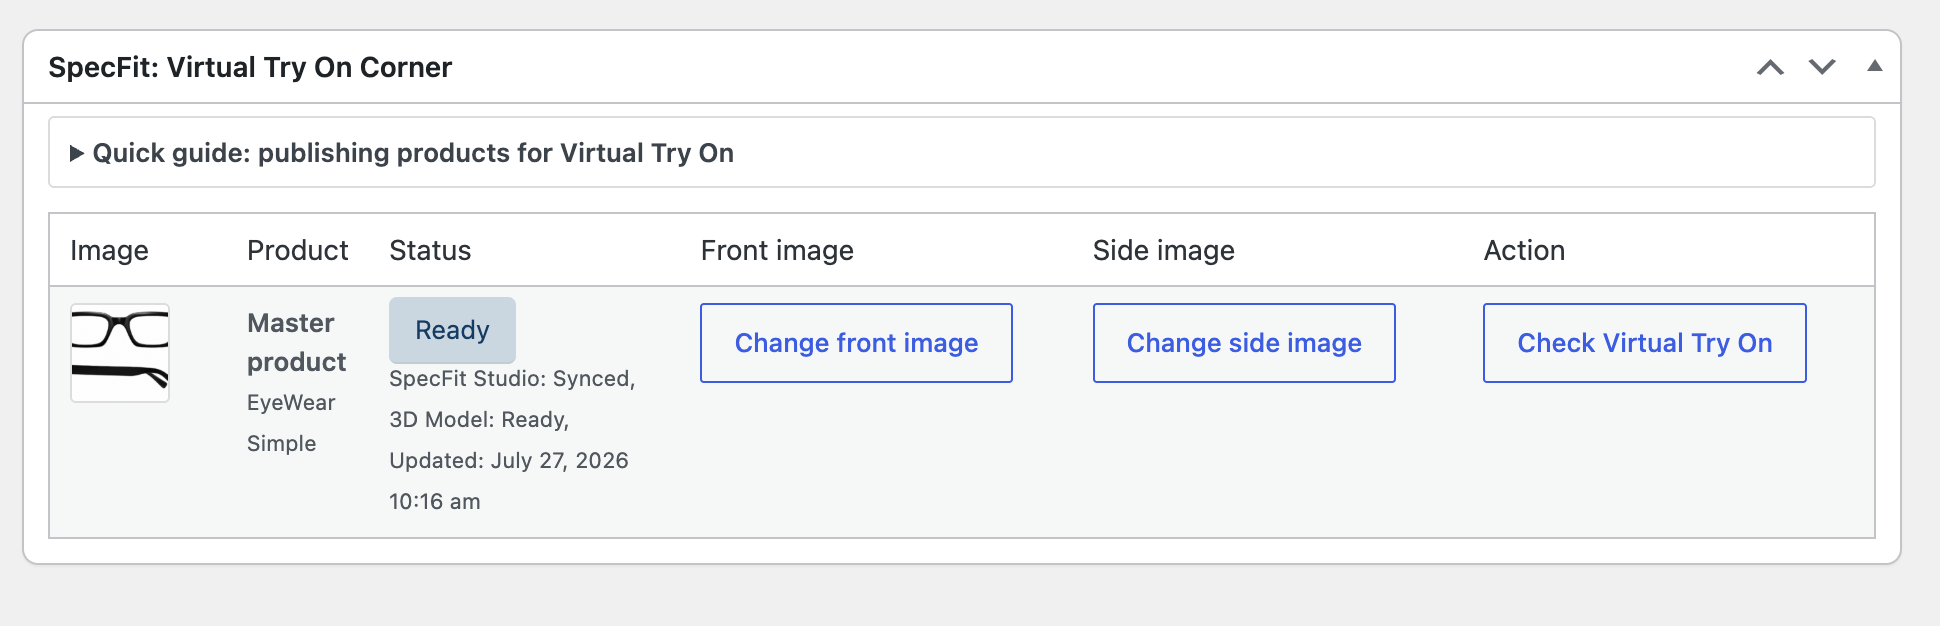
Choose clear front and side images from the WordPress media library, then click Request Try On. These images are used by the SpecFit team to prepare the 3D model.
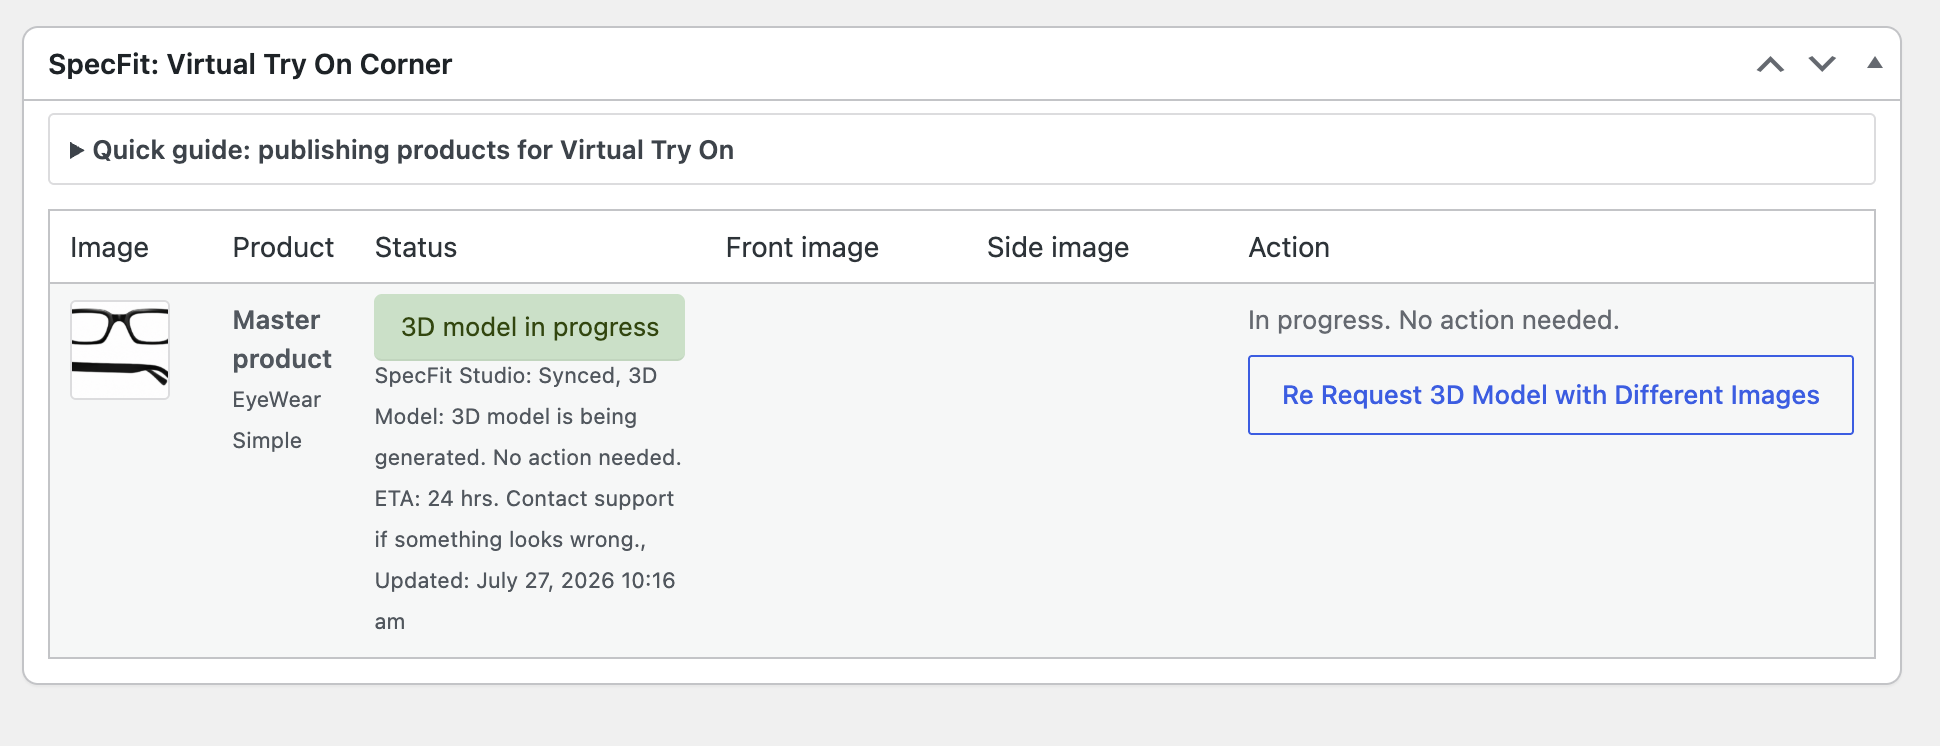
The product status changes to 3D model in progress. No extra action is needed. Most models are completed within 24 hours.
When the product is ready, click Check Virtual Try On from the SpecFit corner to open the product page and verify the shopper experience.
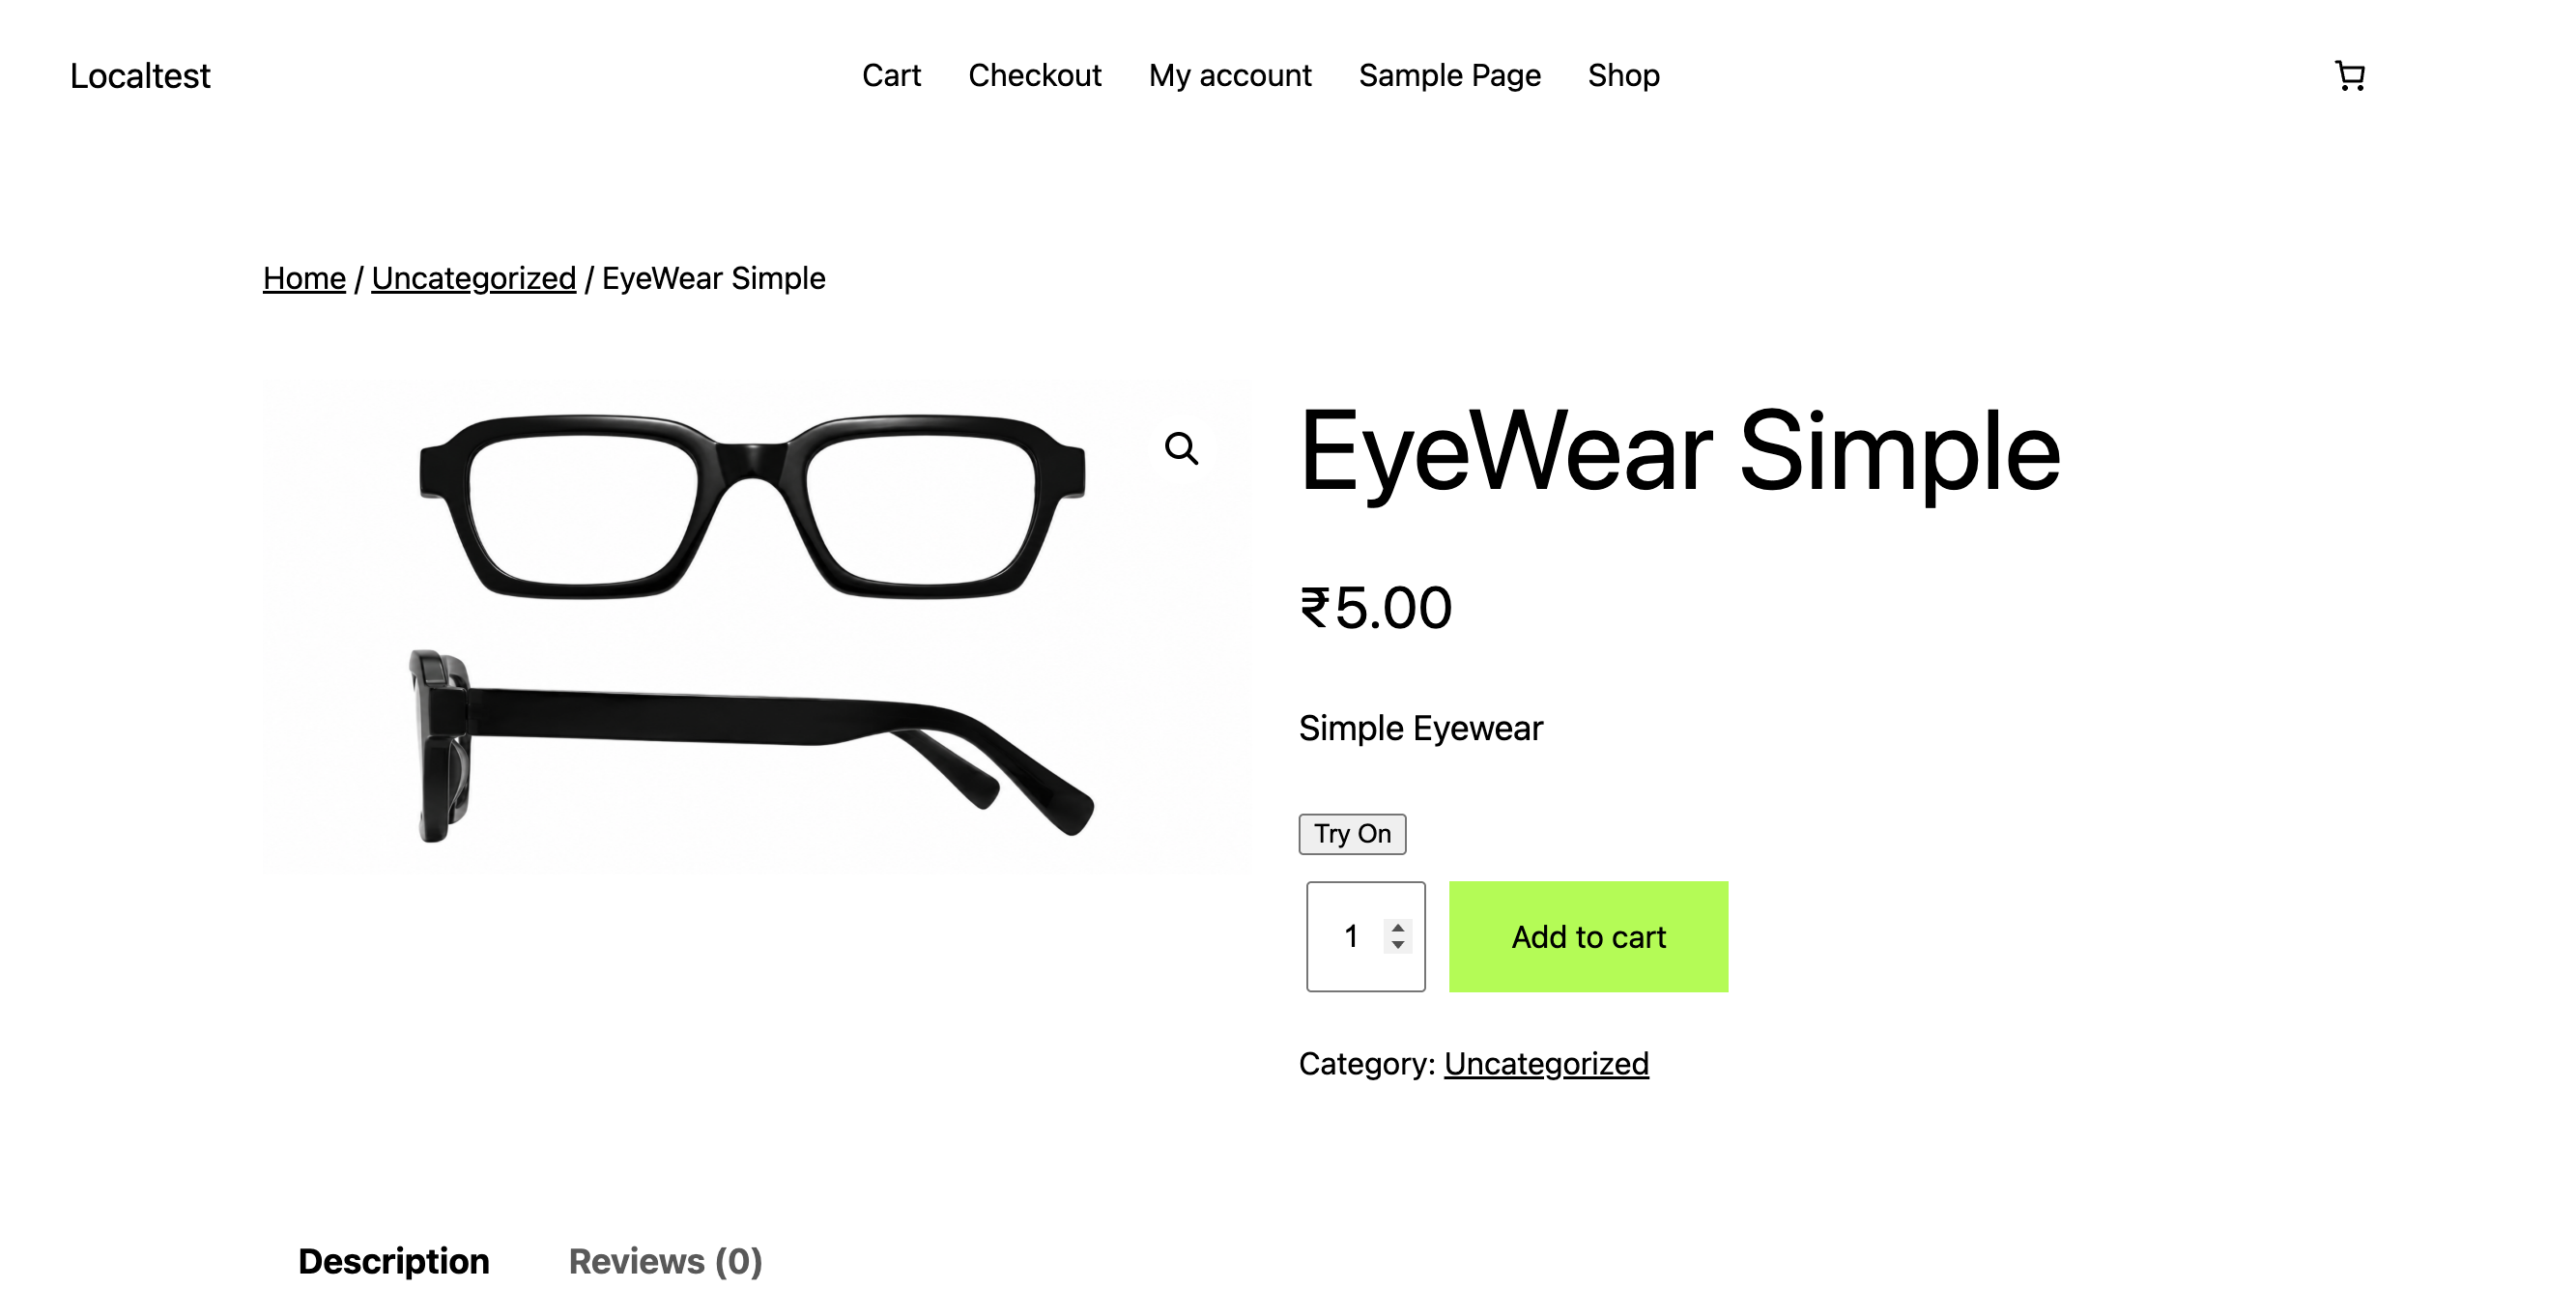
The Try On button should appear automatically before Add to cart on product pages. If your theme hides it, use the shortcodes shown on the setup page.
Come back to the product edit page after a few hours and check the SpecFit corner. Most 3D models are ready within 24 hours, depending on image quality and queue volume.
Product submissions count against your active plan allowance. Bulk publishing is available on paid plans from Studio.
Contact SpecFit support if the button does not appear automatically or if you need help placing shortcodes.